
Your first 30 minutes
Signing up asks for one thing: your shop name. Everything else is a checklist on your dashboard, and this walks one job from quote to the shop floor.
Jeevy runs the path a fabrication job takes through your shop: the quote, the client's purchase order, the plan, the people doing the work, and the material they wait on. This guide takes a new shop from an empty account to its first planned job.
Signing up asks for one thing
The create-shop screen has a single field: Shop name. That is the whole of signup. There is no address step, no logo step, no invite step and no time zone picker, because none of those need to be answered before you can look at the product.
Press Create shop and you land on a short screen that says Your shop is live with your shop's name on it. It moves on to your dashboard by itself after a couple of seconds, or press Go to your shop to skip it.
The setup checklist is the real setup
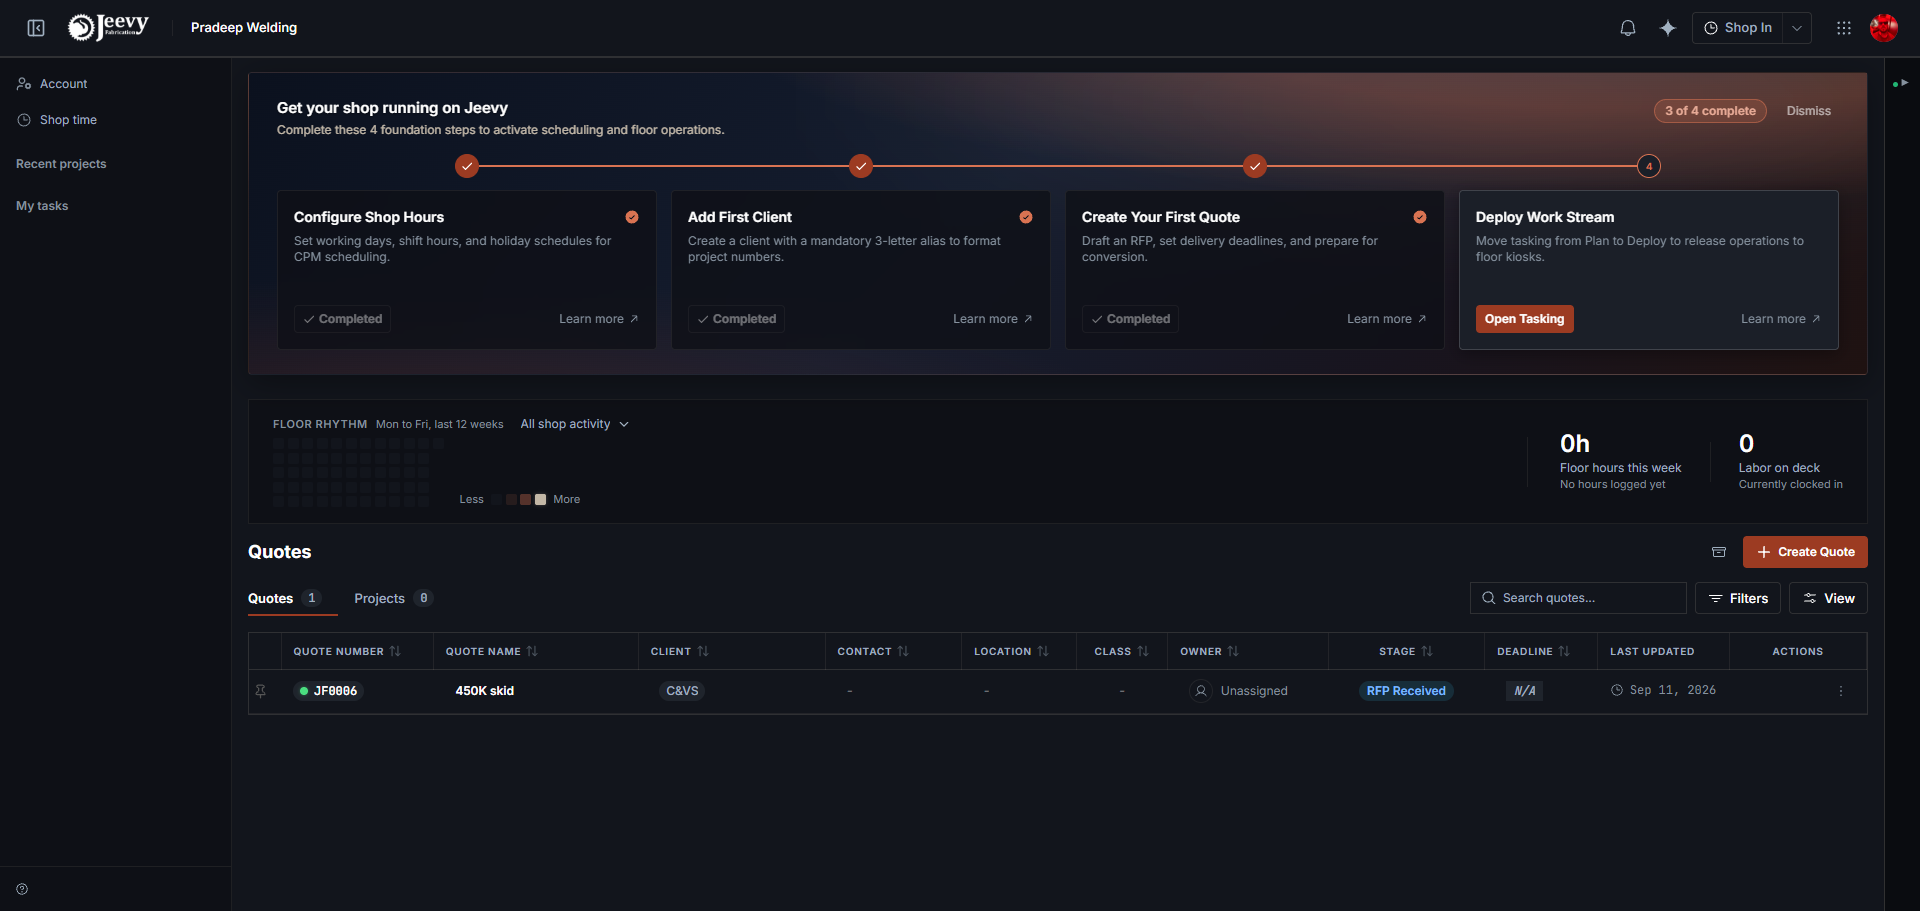
Your dashboard opens with a four-step checklist above the ledger. It is the wizard that used to be in signup, moved to where you can ignore it and come back.
| Step | What it covers | Button | |
|---|---|---|---|
| 1 | Configure your shop | Your address and time zone, the working week and holidays, and your logo | Set Hours |
| 2 | Add First Client | A client, with the mandatory three-letter alias that formats project numbers | Add Client |
| 3 | Create Your First Quote | Draft an RFP, set delivery deadlines, prepare for conversion | Draft Quote |
| 4 | Deploy Work Stream | Move tasking from Plan to Deploy, which releases the work to floor kiosks | Open Tasking |
The steps are sequential. Each one unlocks when the one before it is done, so there is one thing to do at any moment rather than four.
The checklist leaves when all four steps are done, or when you dismiss it. If you dismissed it and want it back, open the help menu and choose Show Onboarding Checklist.
Step 1 sends you to Shop settings, and step 2 needs Client aliases and job numbers read first: the alias becomes the start of every project number for that client, and changing it later renumbers all of them.
Getting your team in
Inviting people is not part of signup any more. It happens on the People tab of Shop Management, covered in Your people.
| Role | Typical person | What they can do |
|---|---|---|
| Owner | You | Everything, including assigning roles |
| Manager | Operations or project manager | Everything except assigning roles |
| Estimator, Engineer | Quoting and engineering | Quotes, projects, planning and purchasing |
| Supervisor | Floor lead | Projects, planning, people and purchasing, but not quoting |
| Floor | Welders, fitters, operators | See their assigned work and clock time |
| Shop station | A shared tablet on the floor | Clock workers in and out, and run kiosk mode |
Take one job to the floor
With the shop set up, walk a single job through from start to finish. It is the fastest way to see how the pieces connect.
- Win the quote. Move the quote's stage to Bid Accepted, then use Convert to turn it into a project with the client's PO number. See Quotes and projects.
- Plan the work. Open the project's Tasking tab, build a work stream of tasks, assign people and set dependencies. See Reading the Gantt.
- Link the material. Attach the purchase order lines each task needs, so the schedule waits for deliveries. See Materials and POs.
- Deploy. Deploy the work stream to release it to the floor.
- Clock the work. Workers Shop In, clock in on their tasks, and clock out with how it went. See Shop time and task time.
What your team sees when they sign in
| Role | First screen |
|---|---|
| Owner, Manager, Estimator, Engineer | The Quotes ledger, or Projects if they used it last |
| Supervisor, Shop station | The Projects ledger |
| Floor | Their worker home, with assigned tasks, today's activity and hours |